
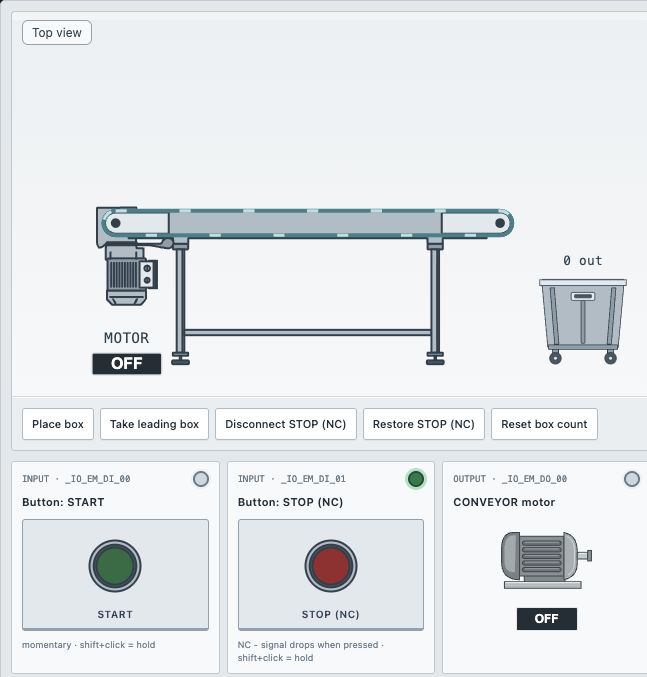
Why a momentary button needs memory
A maintained selector keeps its position. A momentary START button returns to its released state when you let go. If a motor simply follows START, it runs only while the button is pressed. A seal-in circuit keeps the run state active after the initiating pulse ends.
The previous tutorials used combinational logic: outputs depended only on current inputs. Here the previous run state matters too. That is why the release of START is an essential test, not an optional extra.
Read STOP as a healthy-circuit signal
In exercise 16, xBtn_Start is TRUE while pressed. The other input is named xBtn_StopReleased: it is TRUE while the NC STOP button is released and its circuit is intact. Pressing STOP, or breaking its wire in the model, makes that signal FALSE.
The output xMotor_ConvRun commands the conveyor. An output can also be read as a Boolean condition in a contact. Reading it does not create another physical output.
Understand the holding branch in a sandbox example
Use a lamp as a generic run indication and two controls representing Start and StopReleased. The Boolean idea is:
RunLamp_next = StopReleased AND (Start OR RunLamp)- Make two parallel paths: one reads Start and the other reads the existing RunLamp state.
- Place the StopReleased condition in series with the entire parallel group.
- Write the result to one normal RunLamp coil.
- Start the CPU. Pulse Start and release it; the holding path should maintain the lamp.
- Make StopReleased FALSE. Both the start path and holding path must now be unable to energize the coil.
This smaller example teaches the structure without reproducing the full conveyor course solution. Transfer the logic to the course tags, then use its workstation checks.
Test transitions, not just static combinations
| Action | Expected result |
|---|---|
| Initial state, no START request | Motor remains off |
| Press START, then release it | Motor stays on after release |
| Press STOP | Motor turns off |
| Hold STOP and press START | Motor stays off |
| Release START, then release STOP | Motor stays off until a new START |
| Break and restore the STOP wire, with START released | No automatic restart |
The order of releases matters. The exercise's “no restart” check assumes START is released. Do not infer that a simple seal-in rung implements a separate rising-edge restart interlock.
Three frequent wiring-of-logic errors
- STOP only in the START branch: the holding branch can bypass STOP and keep the output on.
- NC ladder instruction for StopReleased: that inverts an already-defined healthy-circuit signal and permits the wrong state.
- Holding START during every test: this hides a missing or incorrect seal-in branch. Always test a brief press followed by release.
This is an educational control circuit, not a safety-rated emergency-stop design. Complete the course exercise for the checked conveyor implementation and reference solution.
Put the explanation into practice
Public tutorial. The linked exercise requires sign-in and eligible course access.
Practice in simulator ↗Ready for the next step?
Develop your ladder logic skills in TIA Portal, from basic conditions to more complete control programs.
Siemens S7-1200/1500 LAD/FBD course ↗
Looking for a broader path? Explore PLC Bootcamp or compare PLC courses by platform and level.
Check the selected offer for its syllabus, software requirements and simulator access conditions.